OK, so after I moved, setting up The Green Room wasn't exactly the top priority, but slowly it has been coming together. This is how it looked the day after the move:
The cabinets all down the side have been there a long time, and obviously pre-date the automatic garage door, but are otherwise all in great shape.
There were a couple of shelves that are probably surplus to my requirements, but otherwise it looks like being a great workshop.
I started by positioning and leveling my main work bench. I got the bench as close to level as I could using some shims I sliced off of a scrap 4x4.
Then I got underneath and secured the bench against the wall with some long screws; finding the first stud was a bit of trial and error, but find one, and you got 'em all.
With the bench secure, I cut some slightly oversize shims and smacked them in with a club hammer. This gives a very solid work surface, and I can hit the bench (or something on top of it) very hard without worrying about the consequences.
Onto the window. I wasn't particularly keen on having a huge window right above my bench, so I covered it over with an old sheet...but that wasn't ideal either....
The solution was to hang my peg board over the window....
Onto the second bench. Installing the drawers was the first step, and then the bench was leveled and secured in the way described above.
The slope on my garage floor is over two inches along the length of the benches:
Last thing was to put down the mats - I find it much more comfortable to stand on a mat rather than the concrete. These mats are ergonomically designed to reduce the stress on your joints that a day standing on concrete would normal cause...I'm old enough now that these things are starting to matter to me.
Tuesday, May 31, 2011
Wednesday, May 25, 2011
The Green Room
OK, so to start with here are a few shots of my new garage taken a few days before the move. I've gained the laundry (not good), but also gained a ton of storage space, cabinets, and shelves (very good). Also, I came up with an instant name for the new shop: The Green Room.
...or dumped in the middle of the floor. Check back soon to see how the workshop gets set up.
(*Note: I get a LOT of stuff mail order/online so UPS are at my house most days and over time I got to know the usual delivery guy a little bit because he has a '67 Mustang undergoing an Eleanor conversion).
 |
| The layout of the cabinets means "bench goes here". |
I rented a 17 foot truck from U-Haul and moved the shop myself. The UPS guy* helped my load the work benches into the truck, and I kind of pushed/pulled them out on my own at the other end. While he was helping me, I tried to talk the UPS guy into joining BAMA. I loaded all the rest of the boxes, tools, and car parts myself. I took my time as I had the truck all day.
 |
| garage nearly empty...apart from some car thing... |
First in, last out: the benches were a good fit under my new built-ins!
This was after everything else got stacked up against the other wall....
...or dumped in the middle of the floor. Check back soon to see how the workshop gets set up.
(*Note: I get a LOT of stuff mail order/online so UPS are at my house most days and over time I got to know the usual delivery guy a little bit because he has a '67 Mustang undergoing an Eleanor conversion).
Thursday, May 19, 2011
California DMV and the YOM program
This piece recently appeared in the BAMA newsletter, and since I got such a large volume of response, I figured I'd post it in my blog too...with a few notes to address the most common questions. If you don't live in California, look away now...
Everywhere you look you'll find a new acronym; often it seems like you're the only person who doesn't know what it means. I recently had the…shall we say…"experience"…of finding out about the Department of Motor Vehicles' YOM program, and I can tell you it's not a chore I'll forget any time soon. Put simply, YOM stands for Year of Manufacture, and it's the name the California DMV has assigned to the newly-legal transfer of original license plates to classic vehicles. In mustang terms, this includes the original cars up to the end of the 1969 model year - if your 1970 Mustang Sidewinder Special has a modern plate, you're stuck with it for the time being at least.
So, while a lot of California mustangs have their original plates, a good many do not. I bought my '68 coupe in Kansas, so registering it in California (within 10 days of arrival, or you're in trouble!) earned me a boring modern white plate with a random sequence of letters and numbers. To start with it didn't bother me too much, but it really looked wrong in photos of my car. So I thought about buying some vintage license plates instead. It's not quite that simple, but if you know the DMV requirements, you can overcome the obstacles.
First you need some plates - two the same in fact. eBay is a great place to look, although prices of vintage California plates have soared since the YOM program started. In 1963 the black plate with yellow characters was introduced. Plates were stamped "63" in the top right corner. These plates were used through 1970 when the background color changed to blue.
In the later years, the "63" was covered with a year-appropriate sticker - and here's the key point: When you show up at the DMV with your pair of black and yellow plates, you better have a sticker from the same year as your car - in 1968 the sticker was pink with black text. You can acquire near-mint condition original stickers on eBay for around 15 dollars, or you can try peeling one off of a plate yourself (tip: first use warm water to soften the adhesive), but you must have a unique serial number on your sticker.
The DMV will photocopy your plate with the sticker, and if the serial# is already in their database, your YOM transfer will be rejected. You also have to fill out the usual DMV paperwork, but it is pretty easy and the forms can be downloaded from their website at dmv.ca.gov. One other thing: the fee for the YOM transfer is currently 45 dollars - it's likely that the DMV officer will ask you for 35, and you can get away with what appears to be saving ten bucks, but it is a false economy - your application will be delayed by 6-8 weeks whereupon a letter from Sacramento will arrive demanding the extra green within five days or your application will be thrown out - ask me how I know! Eventually you get a new title in the mail and you're set to go…
When you do receive your new title, It comes with two additional stickers and a pair of aluminum tags (below). The idea is you place these stickers on the tags and secure them above the license plate...and then your pristine "68" sticker can also be seen. The major implication of this is that you will always be able to tell a YOM car from a car sporting its original plate. I go to a lot of car shows, not just Mustangs, and I've never seen a obvious YOM registered car. I'm guessing that most people toss the extra tags in the trash, and stick the current 201X sticker over the top of the 68....that's right, over the top of the sticker that you just paid out good money to get! Of course if you do this then the car looks just as it would with a plate that's been there for 40+ years. Strictly speaking, this isn't legal, but the chances of getting a ticket, even from a clued-up traffic cop, would have to be slim.
Answers to some questions that came up:
I still have my original plates, which I changed for some reason, and now I want to swap them back...but the 68 (or whatever year) sticker is buried below a pile of later stickers...what now?
The simple answer is that if you're going to put the plates back on the car then the 68 has to be the top sticker when your plates are registered at the DMV. You could try peeling off the additional stickers, but probably you're best and quickest solution is to pony up (!) for a replacement 68 sticker.
I want to put some older plates back on my car, but I also want to keep the plates that are on it now...the DMV wants to take them off me. What gives?
It seems odd that the DMV cares enough to keep plates that will no longer be used - it's not as if they will re-issue them - but right now that's the law, so if you really want the newer plate you can either keep it on the car or transfer it to another vehicle first.
Sunday, May 15, 2011
packing up the shop
With the car wrapped for the at least the next few months, I will be devoting my blog to the setting up of my new workshop. Of course I have to pack up the current one first, and, while I've boxed up my stuff and moved house so many times now that I've got it down to an art, I've never actually packed up a workshop before - never had one to pack up, come to think of it.
While all this was going on, the pile of boxes on the other side of the garage was steadily growing:
I'm going the miss Ferris Bueller's garage, and it's west-facing window.
 |
| Started by emptying the bench out. |
 |
| Then moved the drawers out... |
 |
| ...and detached the small bench from the wall. |
 |
| Several evenings in, and it doesn't look much different! |
 |
| Finally got the large bench away from the wall... |
 |
| ..and all cleared out. |
While all this was going on, the pile of boxes on the other side of the garage was steadily growing:
I'm going the miss Ferris Bueller's garage, and it's west-facing window.
Friday, May 13, 2011
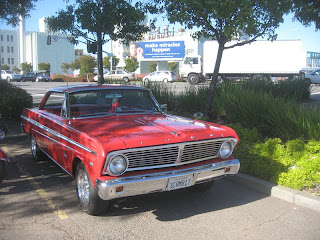
last night at Elio's
Elio's/K-Mart parking lot at Washington and Floresta, second and fourth Thursdays from 4:00 pm, April through October.
Monday, May 9, 2011
rolling re-assembly
So with the steering column complete and re-installed, there were just a few other things to put back before I could move the car. I kicked off by bolting the rear valance support brackets onto the back of the car and hanging the rear valance using the hardware I previously zinc plated.
I put the rear seat side panels back in - it's a shame I didn't manage to get these panels painted at the same time as the rest of the maroon trim, but I just ran out of time. These are awkward objects to store, so it made sense to put back the three screws per side that hold them to the chassis.
Then I bolted the front seats back into the car and added the steering wheel.
A multitude of parts were stashed in the trunk - mostly the big stuff I took off the car (dash pad, grille, export brace) and stuff I won't be needing again for ages like my Edelbrock Performer 289 intake manifold.
So now it's time to put the doors back on. I started by re-attaching the hinges to the A-pillars, using the newly painted and plated hardware. So far, so good....
However, it quickly became apparent that getting the doors back on without first taking off the fender was going to be impossible, so off they came. Of course there was a ton of dirt, grit, rust, peeling paint, crud, you-name-it under the fenders, but I didn't have time to mess with it. I just took the fender off, bolted on the door, did the absolute minimum of alignment, and then put the fenders back on.
After I did both sides, Uncle John gave me a hand to re-attach the hood, and I was done. Now just need to pack up everything else in the garage and prepare for the big move....
 |
| Looking ok but still plenty of work to do here |
I put the rear seat side panels back in - it's a shame I didn't manage to get these panels painted at the same time as the rest of the maroon trim, but I just ran out of time. These are awkward objects to store, so it made sense to put back the three screws per side that hold them to the chassis.
 |
| Rear seat and seat back went in next |
I didn't want my seats to scratch the brand new primer on the floor, so I cut some strips out of the old carpet and fitted them onto the seat tracks.
Then I bolted the front seats back into the car and added the steering wheel.
A multitude of parts were stashed in the trunk - mostly the big stuff I took off the car (dash pad, grille, export brace) and stuff I won't be needing again for ages like my Edelbrock Performer 289 intake manifold.
So now it's time to put the doors back on. I started by re-attaching the hinges to the A-pillars, using the newly painted and plated hardware. So far, so good....
However, it quickly became apparent that getting the doors back on without first taking off the fender was going to be impossible, so off they came. Of course there was a ton of dirt, grit, rust, peeling paint, crud, you-name-it under the fenders, but I didn't have time to mess with it. I just took the fender off, bolted on the door, did the absolute minimum of alignment, and then put the fenders back on.
After I did both sides, Uncle John gave me a hand to re-attach the hood, and I was done. Now just need to pack up everything else in the garage and prepare for the big move....
Subscribe to:
Posts (Atom)


